I ended last week’s email [err.. blog] with the advice to cup hard to dial-in coffees, as it exposes any underdevelopment issues. I received a very logical follow-up question: how do you cup?
Cupping is wonderful for many reasons: it requires no special equipment, it is easy to replicate, you improve your palette, and you get to make gross slurping sounds. There are several variations, so I will just detail what we do here at Cut HQ.
Supplies: hot water kettle, small bowls and glasses, spoons (ideally soupspoons), a timer, a scale, and grinder. Erasable marker and notebook (or cupping sheets) are optional but encouraged.
Preparation: To set the table, we need to fill the bowls with coffee and the glasses with hot water. Recalling my ratio email, ideally cupping will rely on 1:16 coffee to water proportions. At the Cut table, we use 12 grams of coffee to 200 grams of water. Using your erasable marker, write the coffee name on the bottom of the bowl and then measure out 12 grams with the scale. Bowl graffiti is key, as you can shuffle the cups and taste without bias.
Establishing the right grind setting can be tricky but once dialed-in, it will be universal. It should be fine. If you look at your dial, I suggest using the 25% mark (i.e. if the numbers go to 12, grind at 4). The best practice is to take a coffee that you are positive is developed and grind it in incremental steps. Like bracketing a photograph, you will be able to tell the point in which it is not under extracted (watery, bland, tea-like) or over extracted (harsh, dry, bitter). One small note, if you are using a less than ideal grinder, you might want to add a smidge more coffee (i.e. 12.5 grams total) to make up for the weight lost in the grinding process.
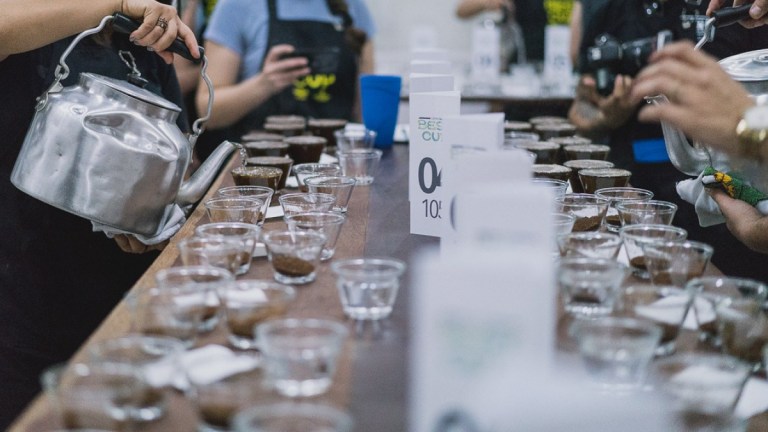
Pouring: Once your kettle hits that 204-205 Fahrenheit temperature, you can pour! Set the timer to 9 minutes, tare the scales, and add 200 grams of water (assuming you have 12 grams of ground coffee). Smelling the ground coffee dry and right after the water hits it will give you a good sense of the aromatics.
The Crust: Akin to crema, a foam or crust forms from dissolved gases (mainly CO2). The darker the roast, the thicker the crust (because of increases in elements like pyrolytic gas). If there is no crust, the coffee might be underdeveloped and signaling that it has very low solubility; alternatively, this can indicate a degaussed older roast. After 4 minutes (if you set your timer to countdown from 9:00, it will now read 5:00), break the crust with a spoon and take note of your aromatic impressions. After smelling, use one or two spoons to clear off the crust by skimming it into your hot water glasses. Replace the water in the glasses as these oils will block taste reception.
Tasting: After 9 minutes have elapsed, dip your spoon just below the surface and slurp. Much like wine tasting, the goal is to aerosolize the coffee to give a more complete profile picture. If you do not want to drink enough caffeine to see through time, spit into a cup/spittoon. As coffee cools, extraction continues and it is good to try them over the course of 15-30 minutes. I like the 9/18/27 minute marks for insight into the coffee’s roast. So taste, clean your spoon in the hot water glass, taste the next bowl… let some time pass and repeat.
Results: Ensuring identical treatment and protocols (weight, grind, temperature, time) across the board will let you truly gauge the roasts. Unlike brewing, there is no way to hide errors on the cupping table. There is no shortage of cupping sheets out there to help guide you through tasting but I focus on the following elements:
Sweetness: As I pontificate weekly, sweetness is the most complete representation of terroir. Unlike the one-dimensional flavours of underdevelopment (sour) or over-roasting (bitter), sweetness is complex and through the array of fruit, berry, citrus, and cocoa communicates a great deal about its unique origin and growing conditions.
Finish: Partially to avoid the term ‘mouthfeel’, I like to focus on the duration of the finish. If it drops off quickly, the coffee is likely baked. A nice juicy sensation should linger on the tongue. I avoided ‘mouthfeel’ and yet this paragraph is still gross.
Profile Construction: Ideally, a great roast means the cup opens with sparkling acidity, moves to fruit sweetness, and ends clean. Watch for any jagged flavours or weird combinations or out-of-balance notes (under ripe, pith, paper, bittersweet chocolate, spice), as these signal roast errors.
Best & Worst: While numerical ranks work well for grading coffees, one of my favourite habits at the table is describing the best and worst elements of every cup.
 This work is licensed under a Creative Commons Attribution-NonCommercial-NoDerivatives 4.0 International License.
